

I am so glad you're here! This is my little corner where I get to share some of my most favorite images from engagements, weddings, births, my travels and my own little family from time to time. Hang out, look around, and please reach out to say hello!
explore:
welcome to my
home on the web
Weddings
births
Engagements
Families
Long before I ever knew anything about photography, it seemed like the one thing I did know was that photographers needed “good light”. But I really had no idea what that meant or how to find it. It wasn’t until I packed my camera and a suitcase and flew to France to spend a week learning from a National Geographic photographer that “good light” clicked with me (if you’d like to take one of their trips, you can check them out here… I HIGHLY recommend them!). I can’t remember exactly how Catherine Karnow (the photographer for this trip) explained it, but I finally got it. So, I’m hoping to use this post to take what I learned on that trip and what I’ve learned since to try and help others who are trying to figure out just what “good light” means.
Light in and of itself is a funny thing. It’s hard to trap it because it can seep through any tiny hole or crevice (such as light coming through a space in a wall or door). And when it’s in an open space (such as the sun), it’s bouncing off of everything and going everywhere. This crazy windy image of me below was one of those moments when the idea of light just clicked. We were wandering around the ruins in Les Baux, France and in this one crevice/walk through, the light was incredible! And since the stone was a lighter color, it was reflecting the light even more so than if it had been a darker color. The only reason I ended up with this image of me is because I’d wandered away from everyone and they had gone in different directions… and I needed SOMEONE to stand there for a portrait! The light was too good to waste! Now, don’t get me wrong. I did end up lightening this up a touch and adjusting the white balance in post processing, but it’s really close to what came out of my camera.
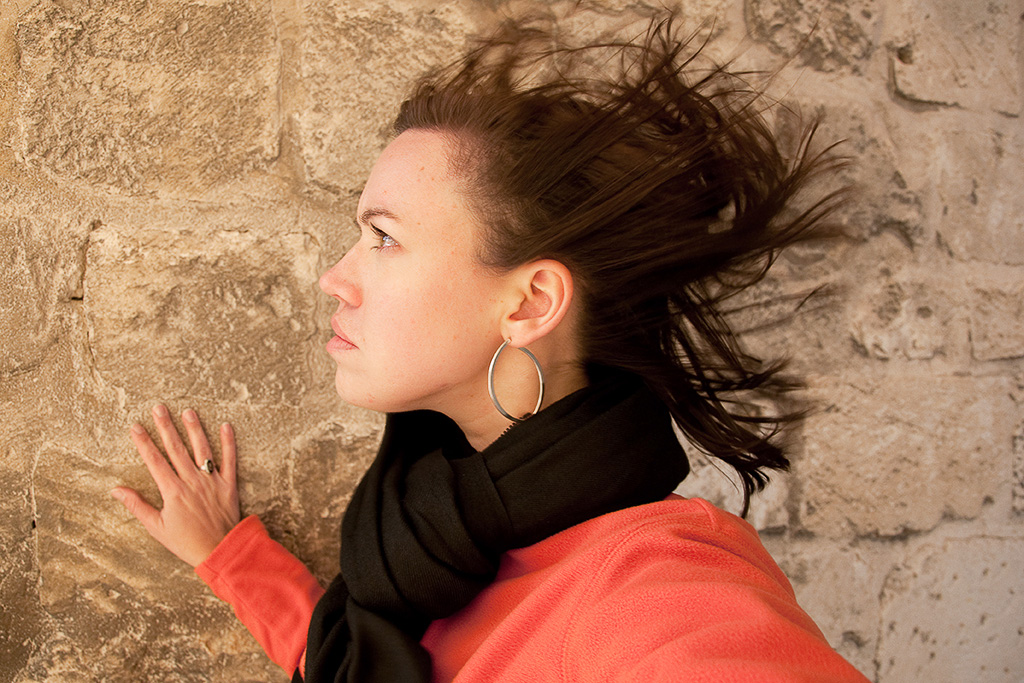
I’ll put all of the geeky camera info and settings below each image. Above image: 18mm (cropped sensor), ISO 400, f5.6, 1/80 sec
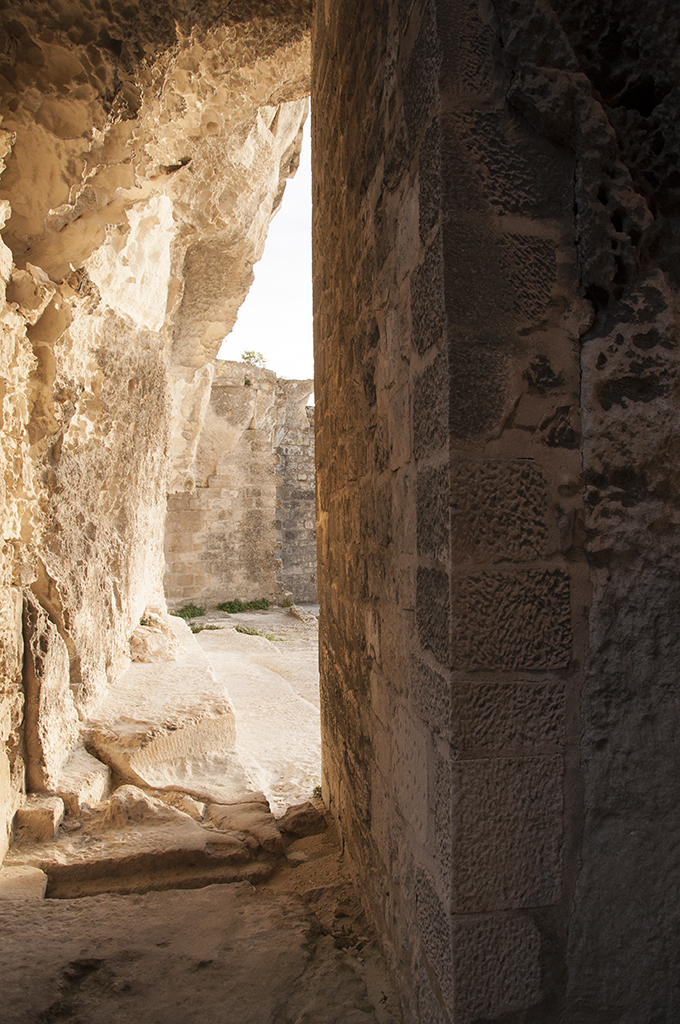
This image below shows a little more of where I was… the wall on the right is the wall my hand is on in the picture above. And while there is SO MUCH light to the left of the image, it’s still coming in and bouncing all around, which is how I was lit so well in the image above. If I had exposed for the wall on the right, then it would be lighter and the left side of the image would have been blown out (you wouldn’t be able to see any detail). But honestly, I didn’t know how to do that in 2009 :-)
This picture from Davis and Matt’s wedding last June was taken in open shade, not just shade. And now you’re thinking, “What is open shade, Sabrina??” The best explanation I’ve ever heard was that if you’re standing in shade (there’s no sun directly hitting the ground you’re standing on) and you can look up and there is nothing hindering your view of the sky (i.e.you aren’t standing directly under a tree), that’s open shade. Open shade is usually available around tall trees or buildings. You’re still getting plenty of light since it’s bouncing around everywhere, but there’s no direct sunlight to cause harsh shadows on people’s faces.
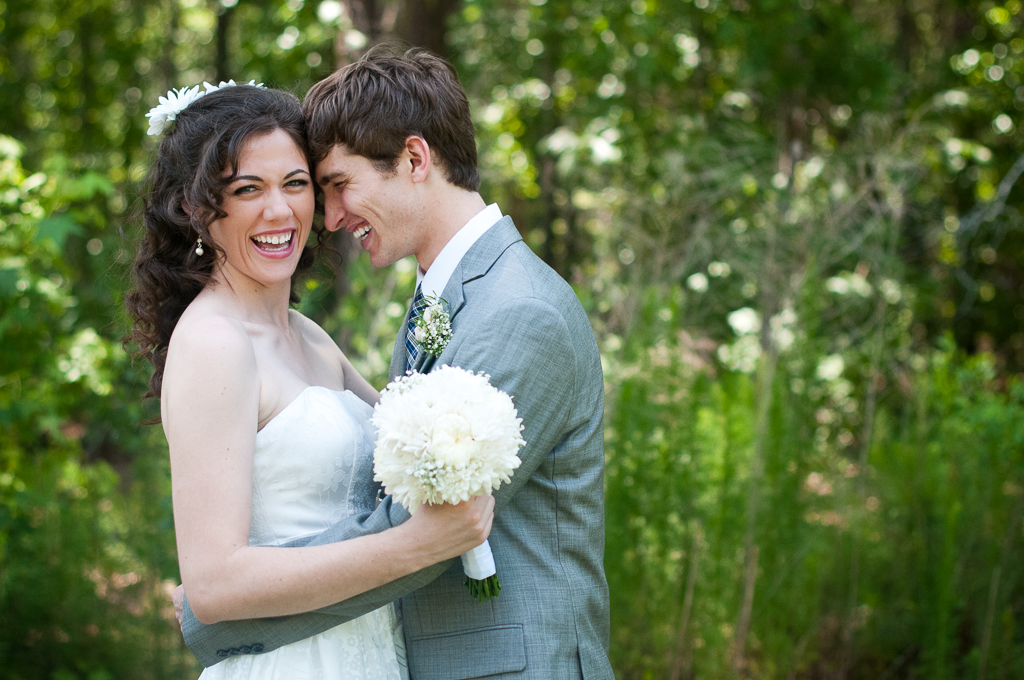
Above image: 50mm (cropped sensor), ISO 800, f2.2, 1/2500 sec
Which brings me to Stephanie and Joe’s wedding where it was like we had constant open shade! Cloudy days can sometimes be a photographer’s best friend, but it depends on the time of day and the look you’re going for. With Steph and Joe’s wedding, it was perfect because their ceremony was early evening, which meant their First Look was around 2 or 3pm, which means the sun would have been almost directly over our heads in this field. If the sun is directly overhead, it can cause some harsh shadows on people’s faces (which is why open shade, if you have it, is so helpful!). But with an overcast day, the clouds act as a diffuser, causing the sun to EVENLY distribute light all over, which eliminates the worry of harsh shadows.
The thing to be aware of though is that even though it’s cloudy, the sun is still “out”. And because the light is a little dimmer, your subjects need to be turned towards the sun. An easy way to figure out where the sun is on a cloudy day is to hold out your hand and look on either side of it. The lighter side of your hand is the direction your clients need to face!
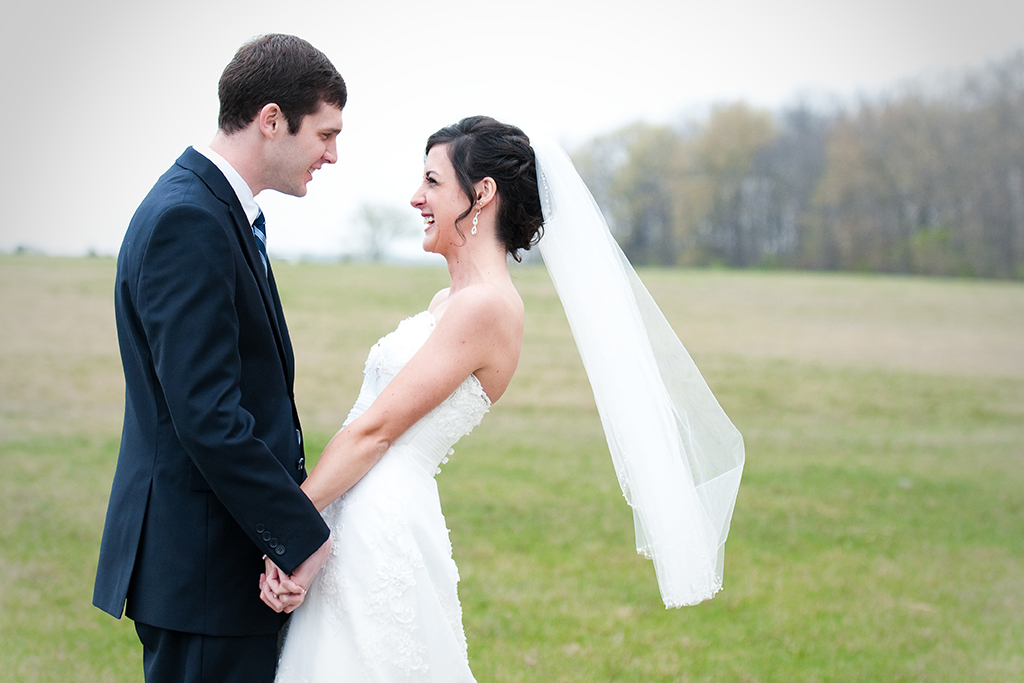
Above image: 70mm (cropped sensor), ISO 400, f2.8, 1/1250 sec
This image from Susan’s bridals is another example of open shade. If you look at the trees in the background, you can see the sun hitting them and you can tell it’s really bright. But the light around Susan is evenly distributed and oh so pretty! All because Tillman Hall is blocking the sun to the left. If Susan had looked straight up, she could have clearly seen the sky… hence, open shade!
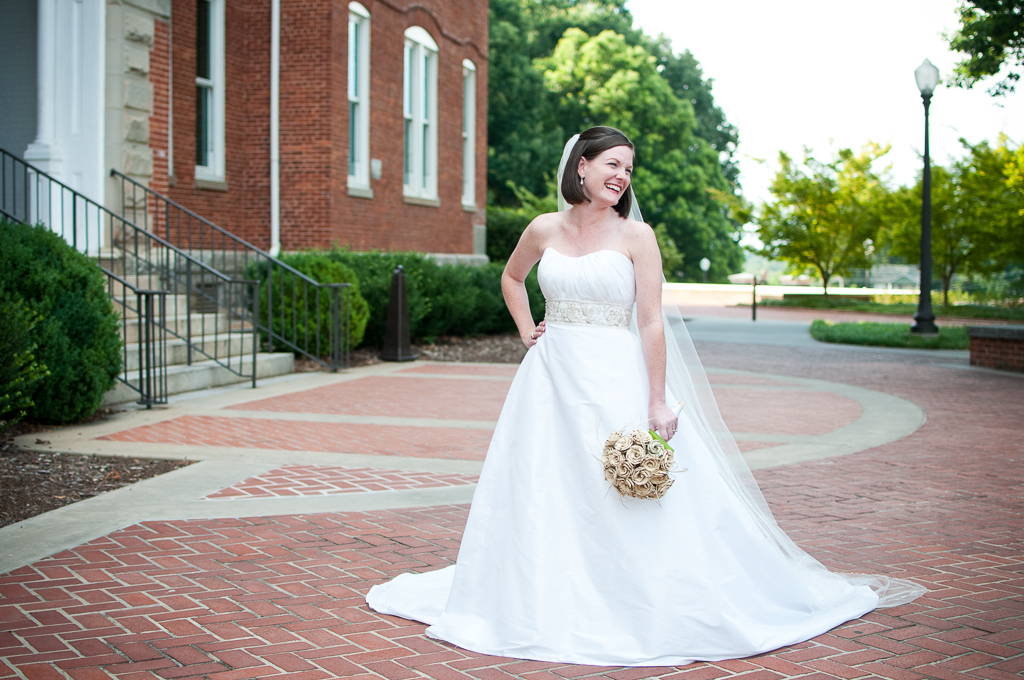
Above image: 35mm (cropped sensor), ISO 400, f2.2, 1/1600 sec
Here’s another example of open shade in downtown Greenville from Mandy and Kevin’s engagement session. In the windows behind them, you can see the reflection of the sun setting behind where I was standing. But because the sun was lower than the building behind me but had not yet set, light was still bouncing all over the place, including off of the grey stones that Mandy and Kevin were standing on.

Above image: 35mm (cropped sensor), ISO640, f2.8, 1/800 sec
Now this is where some rules get to be broken! An hour before sunset, especially during the summer, is all glowy and warm and pretty (no, glowy isn’t a real word)… it’s known as the “golden hour”. And rightly so! As we finished up Elisha and Cale’s engagement session last August, the sun began to dip behind the trees that you can see in the background. When I asked them to sit in the grass, I placed myself so the sun was just over Elisha’s shoulder and exposed for their faces. Because I did that, you can’t see any detail or color in the sky, but working with natural light (no flash or external lighting), you can only have one or the other. If I had exposed for the sky, this image would be a silhouette of them instead. And since the stones were a lighter color, they were acting as a natural reflector and bouncing the light back up towards them and evenly lighting them.
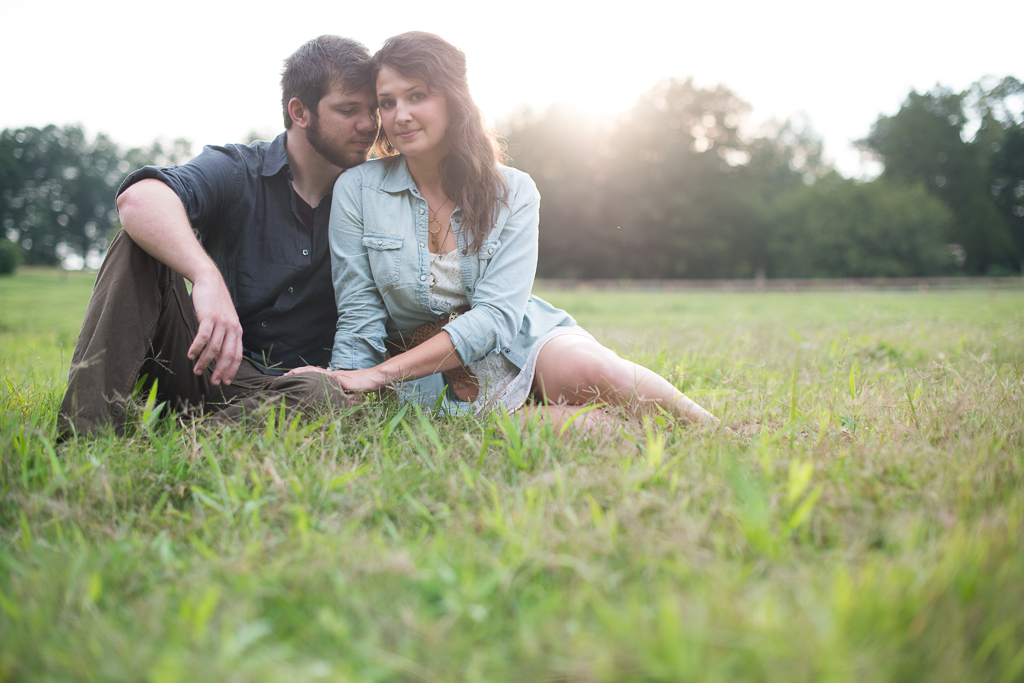
Above image: 50mm (full sensor), ISO 400, f2.2, 1/1250sec
The location of the image below would not have been the best spot for this shot before the sun went behind the trees. But since it had dipped below the tree line, I could have Elisha and Cale facing the sun without squinting, which allowed them to be beautifully and evenly lit.

Above image: 50mm (full sensor), ISO 640, f2.2, 1/1000 sec
The image below of Sarah and her family is kind of similar to the one of Elisha and Cale in the field above, except that you can tell the sun is higher in the sky and to the right. Because of where I was sitting, the sun is flaring into the image giving it that same glowy kind of look.
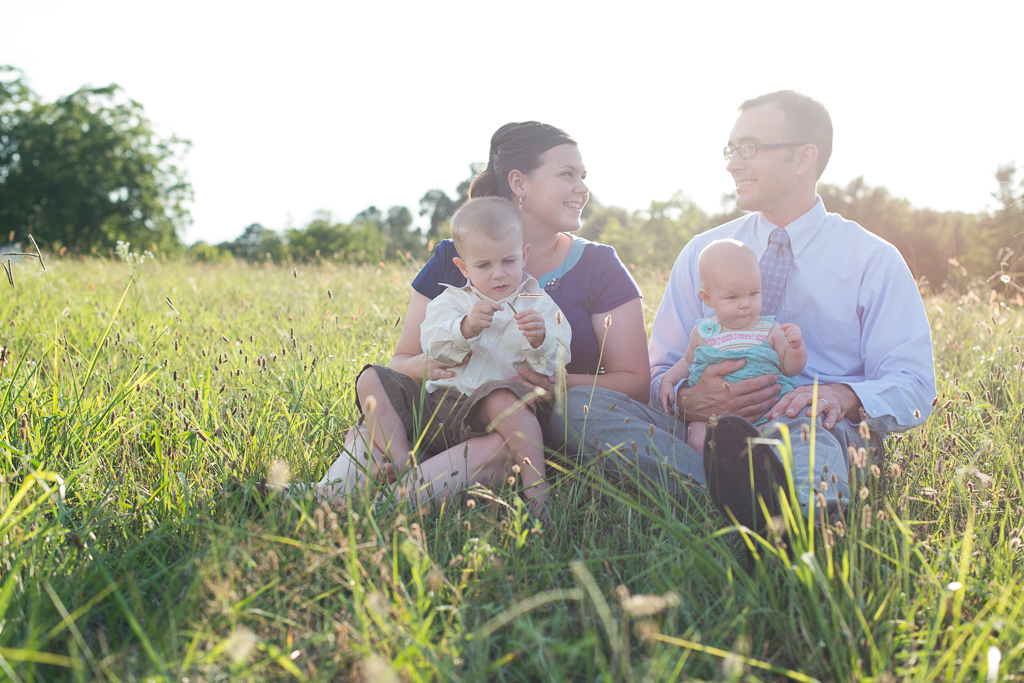
Above image: 50mm (full sensor), ISO 400, f4, 1/800 sec
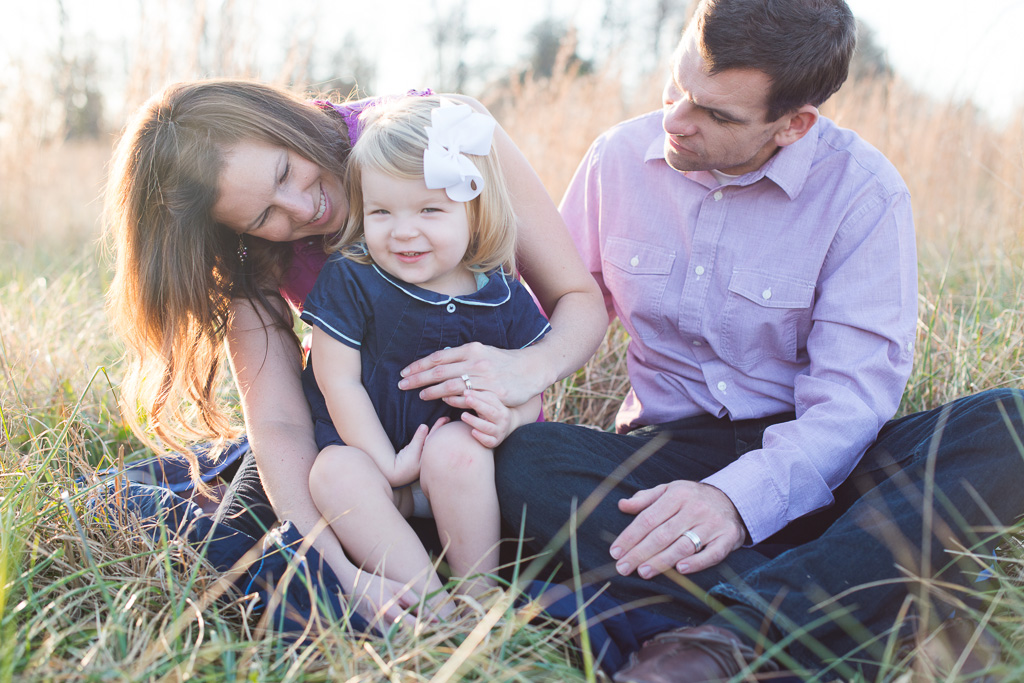
In this image below, I moved to the right so the light wasn’t pouring into my camera and they would be more evenly lit. But you can still tell the sun is behind them as the right side of Sarah’s face has most of the light, so you know that the sun hasn’t dipped below the trees yet. But because she and Andrew are sitting with their backs to the sun, they’re providing open shade for the kids, and because of my angle and them looking at each other, their faces are in “open shade” too… sort of :-)
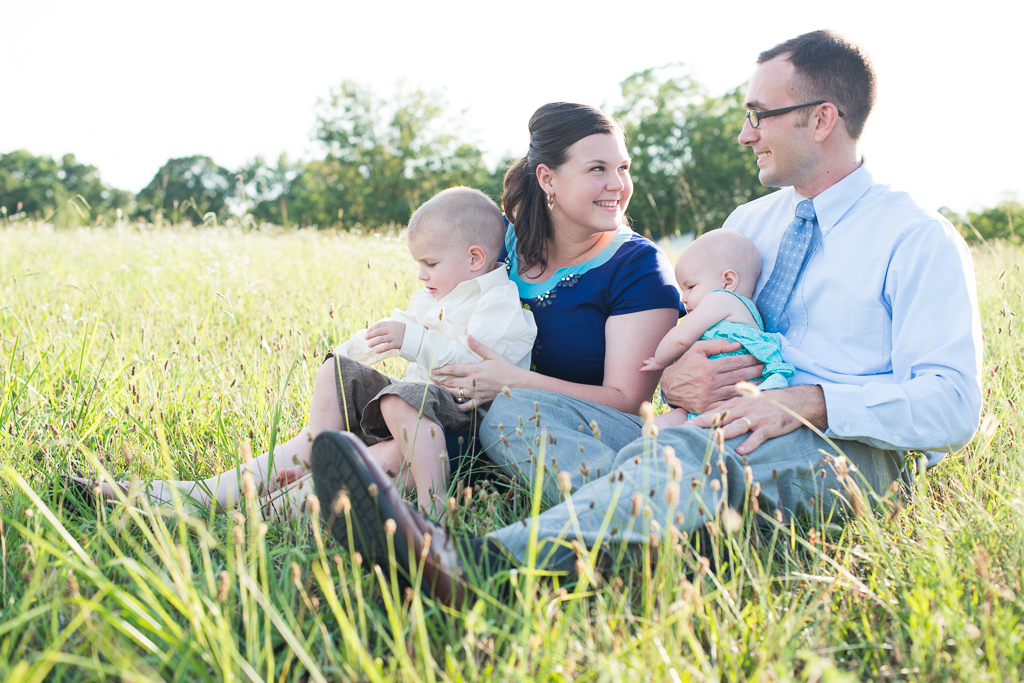
Above image: 50mm (full sensor), ISO 400, f4, 1/800 sec
I just love this image :-) And not JUST because of the people in it! It was early December and unseasonably warm (which is why Kelly is in a sleeveless shirt) and this was taken right around 4:30pm, which is the golden hour in the winter. If we had taken this at 4:30pm during the summer, the sun would have been much higher and wouldn’t have been anywhere near as warm and glowy! You can tell that the sun is to the left because of how it’s hitting Kelly’s hair, the top of Harper’s head and the side of John’s face. But because it’s mostly behind them and not in my frame, they’re all evenly lit.
Above image: 50mm (full sensor), ISO 400, f3.2, 1/640 sec
In this one of just John and Kelly, I positioned my camera to let the sun be a part of the picture. So, it’s more drenched in light and gives it a sun washed look (I have no idea if that’s a real term, but I’m sticking with it!).

Above image: 50mm (full sensor), ISO 400, f2.8, 1/500 sec
I really hope this has been helpful for at least one person out there! I’m no where near an expert on light (obviously, if I’m making up words!), but it’s what I’ve learned over the years of shooting and I want to share as much as I can. So many people have graciously poured into me and helped me SO much along the way. And if I can pass that knowledge onto others, even if it’s just one person, then that makes me really happy!
Happy Friday and happy weekend!
Thank you, Sabrina. I am trying to learn how to take better pictures because I am asked to do it. Lighting is something I happen upon accidentally but would like to be a lot more intentional about. This is a good tutorial – especially with the pictures as examples.
What a great info Sabrina! Gorgeous images! Thanks for sharing!