

I am so glad you're here! This is my little corner where I get to share some of my most favorite images from engagements, weddings, births, my travels and my own little family from time to time. Hang out, look around, and please reach out to say hello!
explore:
welcome to my
home on the web
Weddings
births
Engagements
Families
I’ve mentioned before how I can be late to things – trends and technology, mostly! And it took me a while to jump on board with this too. I’ve even heard other photographers say the same thing, “I just wasn’t sure about it… I already had my workflow down, so why change that up? And it’s HOW MUCH?”
All of those things went through my head too. Until I downloaded the 30 day trial last year. And let me just tell you, Photo Mechanic will change your editing and workflow world. Yes, it’s $150, but it’s a one time fee and that’s it. It’s yours after that! You can even put it on several computers (I have it on my iMac and my MacBook Pro so I can use it at home or when we’re on the road).
I’m going to just go step by step to help you understand what Photo Mechanic does and how it will help you…
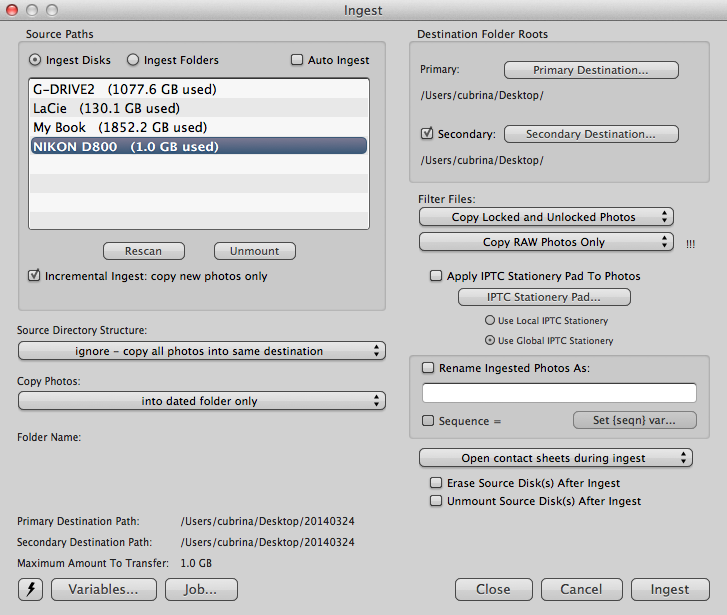
First, when you insert your memory card, this window will pop up (if you already have Photo Mechanic open). It lets you select the card (or multiple cards at once!!) to download and then you select up to TWO destination folders for those files. Honestly, this is one of my favorite parts. Because when we get home from a wedding, it’s usually late and we’re tired, but I want those files downloaded and backed up before going to bed. This used to take forever because once they all downloaded, it would then take another 30+ minutes to transfer all of those files to another drive. But with PM, it does that all at once!
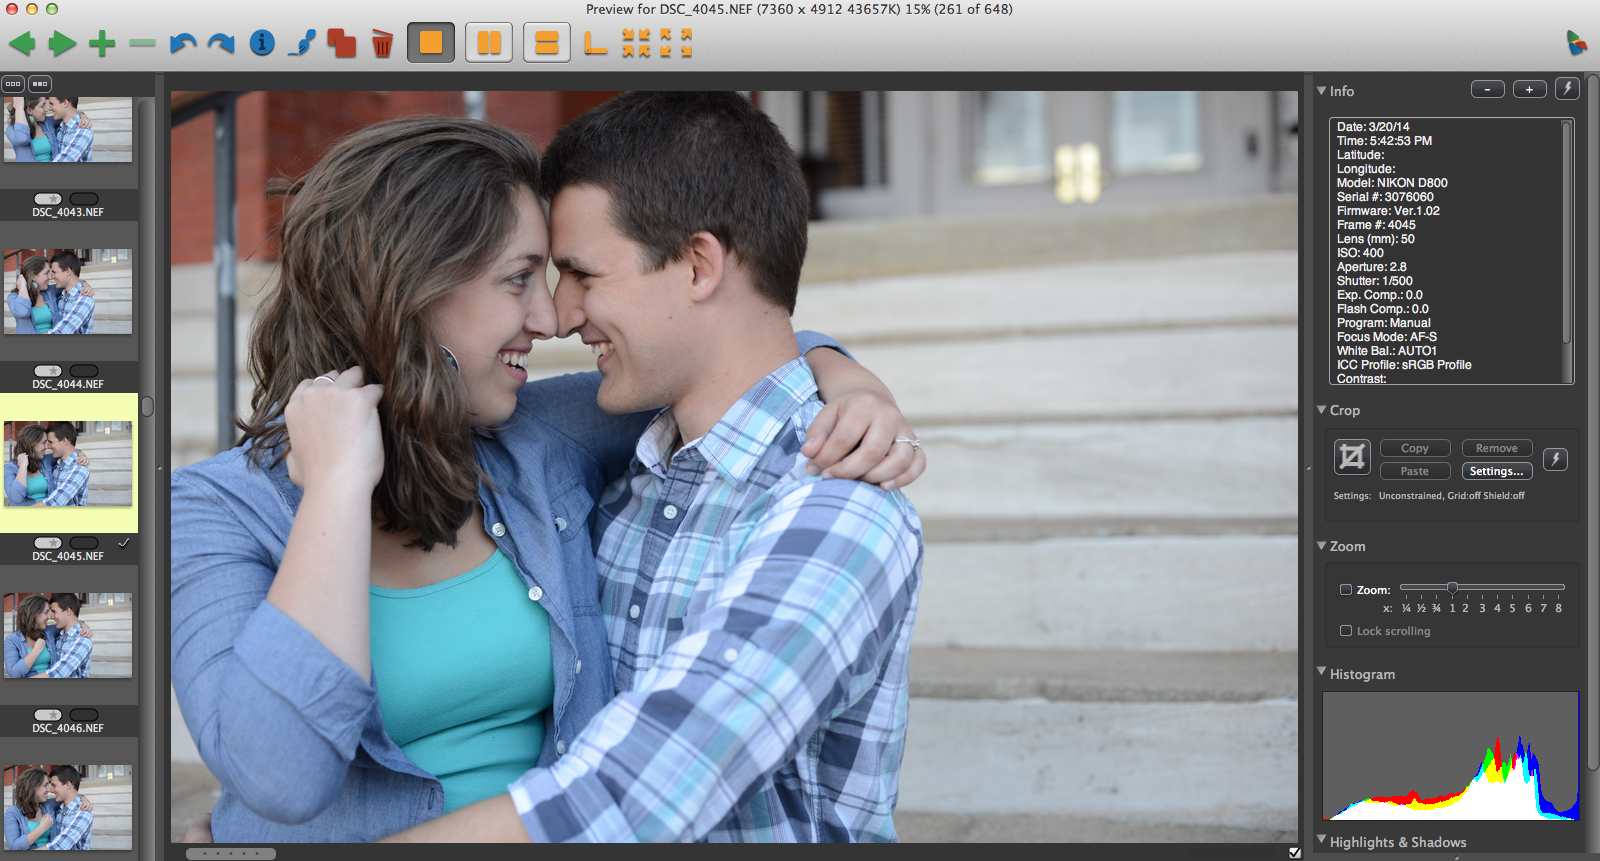
As the photos are ingesting into PM, you can actually start your culling (choosing the best photos and narrowing down your files) at that time. Because unlike in LightRoom, there’s no rendering time for each file in order for you to see it clearly. When it uploads and you click on it, it’s as clear as it’s going to be! So you don’t have to sit and wait for it to load to see whether you want to keep it or not. As soon as you click on it, you can tell whether it’s in focus or not. The screenshot below is the contact sheet. The image below that is what you see when you double click on an image.
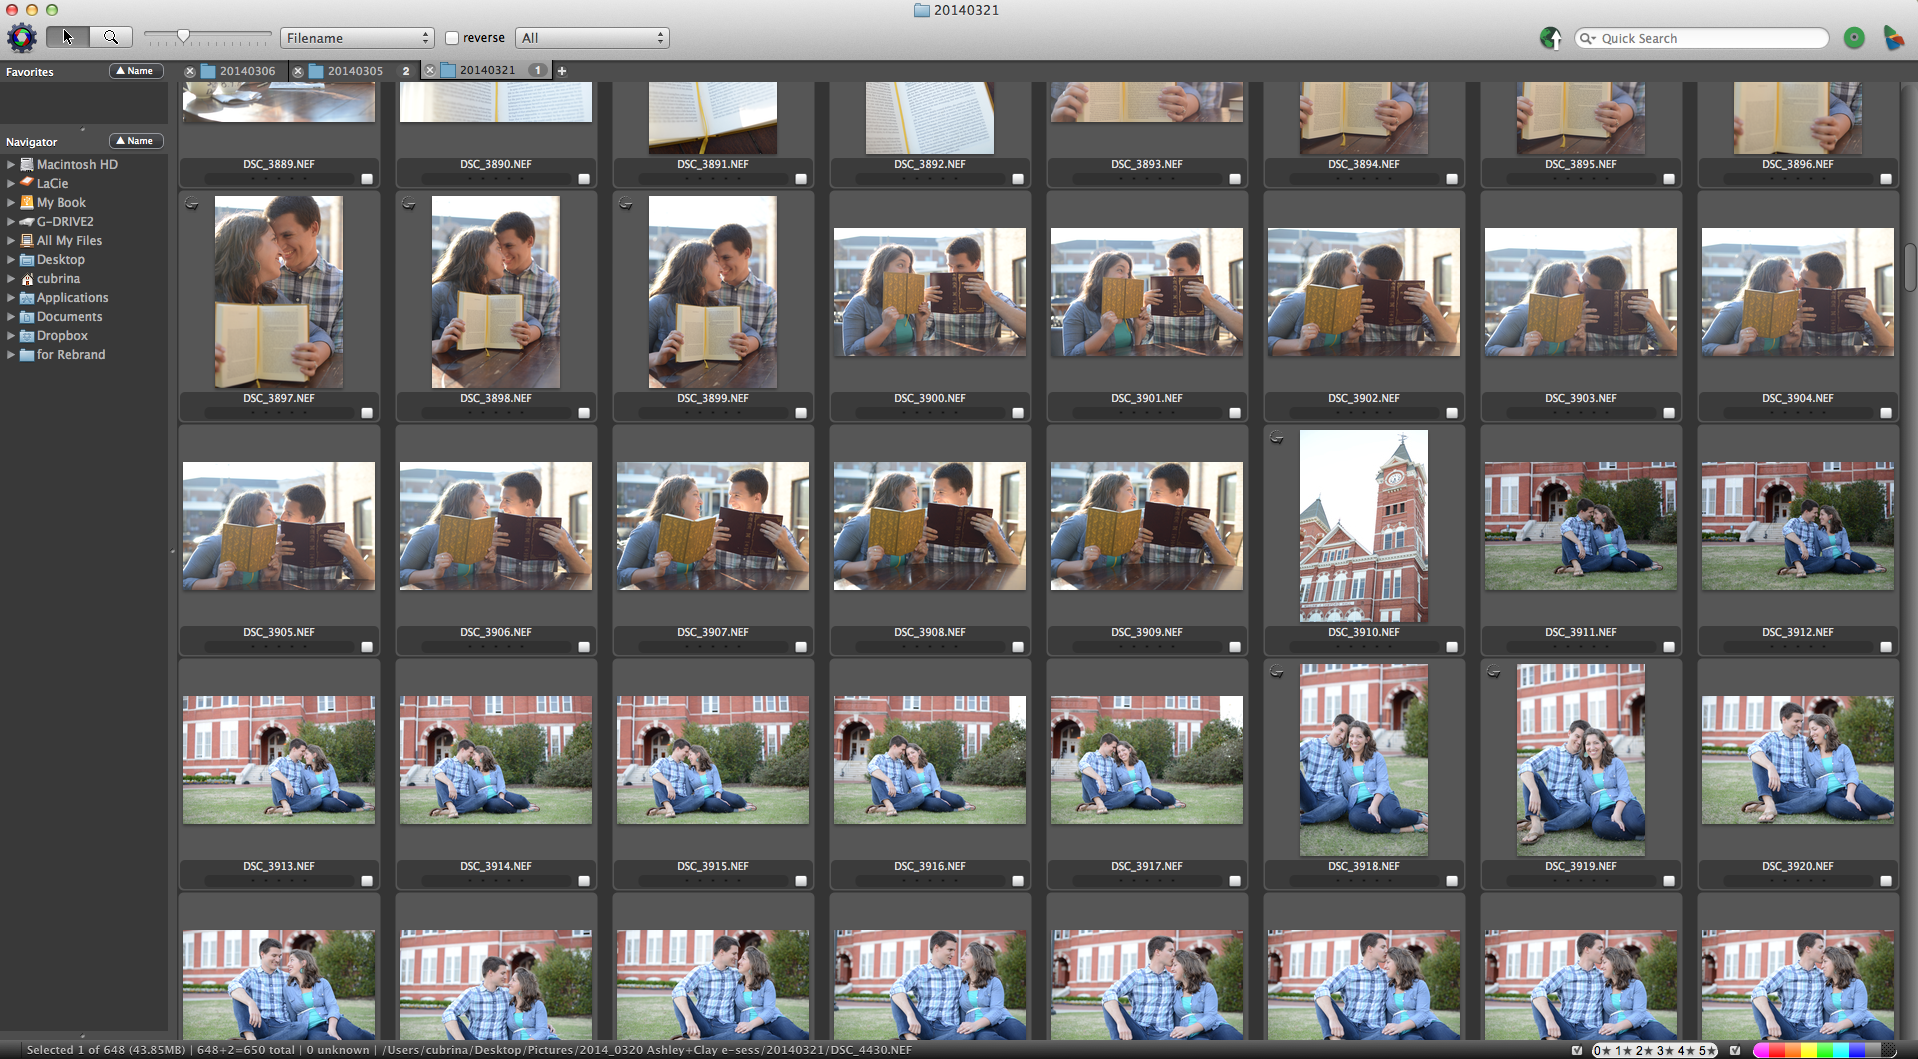
So, this screenshot below took no time to render. Meaning that instead of culling in LightRoom and waiting several seconds with each image, I can see each one immediately in PM.
At this point, there are several ways you can choose/mark the files you want to keep. You can star them (which also transfers into LightRoom) or you can Tag them (just hitting T on your keyboard). It puts a little checkmark under the photo you’re looking at and then you keep moving down the line. I’m a big keyboard user so all I’m doing while I cull is clicking T and the down arrow on my keyboard. It’s brilliant!
Now, if you need to zoom to see details, there’s a box on the far right that you can check that will let you zoom and then you can zoom in as much or as little as you like. You can also see all of your metadata in the top right box too.
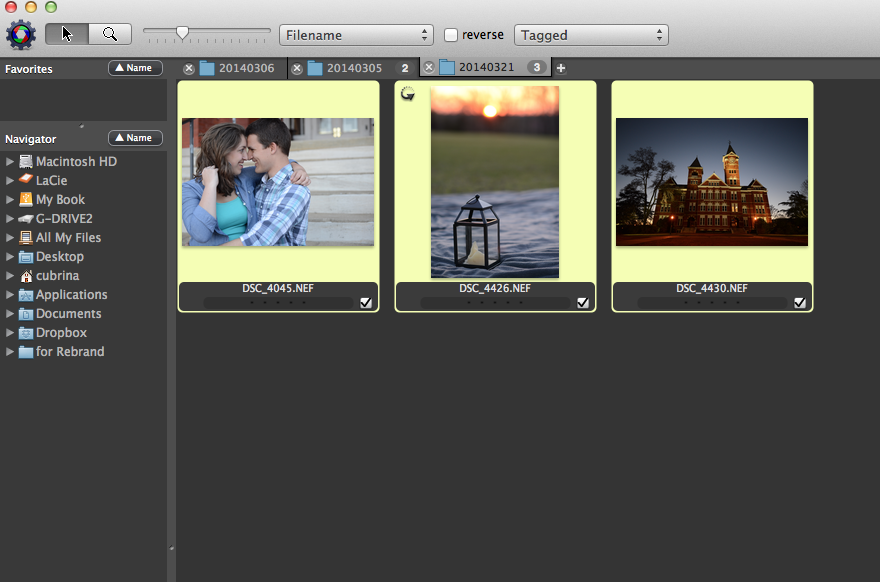
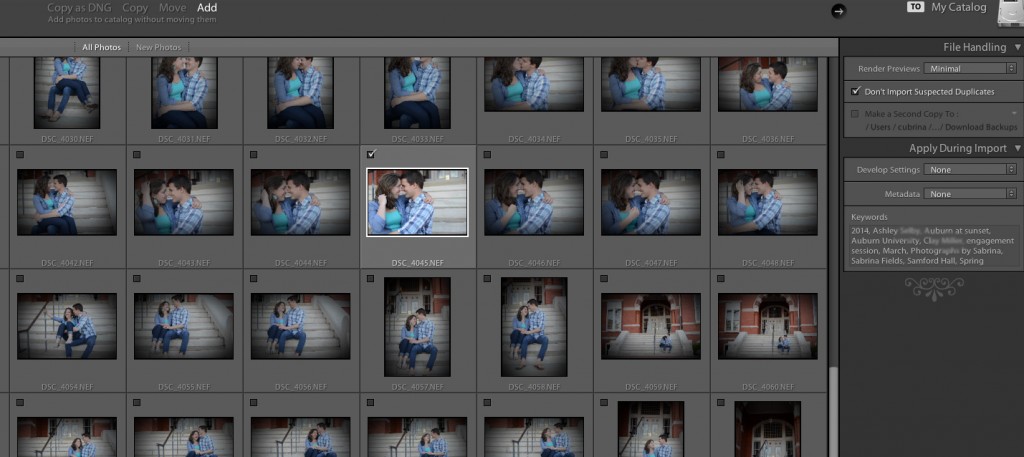
So once you’ve culled all of your images (which you just did in record time!), you can click on the second drop down box at the top of your screen and select “Tagged”. This brings up all of your culled images (obviously I only selected a few for this screenshot… I’ll have a lot more for Ashley and Clay’s actual blog post tomorrow!). Once you’ve narrowed what’s showing on your screen to just the images you selected, hit Command+A (or Ctrl+A on a PC) to select them all. To get them all into LightRoom, all you have to do now is click on one of those highlighted images and drag them into LightRoom (just make sure you’re in the Library Module)! How easy is that??
Once you drag them into LightRoom, enter your Keywords to the right, choose the Develop Setting you want to apply to all of them as they import, then at the bottom of your screen, click Import.
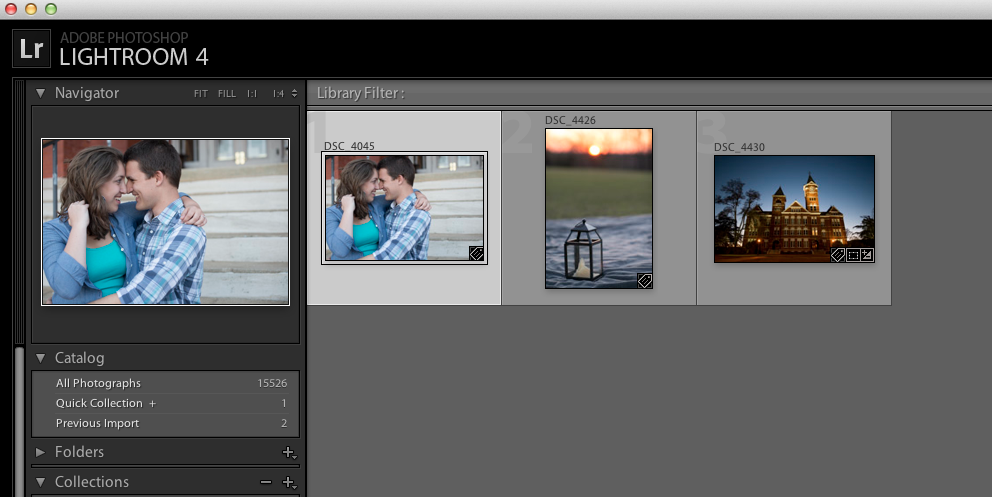
Once they’re all in, you’ll see this and you’ll be ready to finish editing! I’ll do a blog post on LightRoom soon so we can get into more of those details then!
I’m no expert at all and I’m sure there are all kinds of tips and tricks for PM that I haven’t mentioned. But hopefully this at least helped you understand a little more about it and has convinced you to at least download the free trial before you cull and edit your next session or wedding. If you have any questions or tips of your own, please leave them in the comments below!
Hmmm… this intrigues me. Thanks for sharing! Gonna check this out!